 We've all picked up makeup tips and tricks over the years. Some more helpful than others...and some completely bogus! Here are some of the makeup myths I hear on a regular basis.
Myth #1: A much lighter concealer will cover your dark circles Answer: Well, not necessarily. A lighter concealer will work great if you want to highlight under the eyes and brighten the face, which is different from concealing. If the circles under your eyes are dark or discolored you may benefit from a color correcter or even a concealer the same color as the rest of your face. Also, the shape in which you apply the concealer can hide more of a dark circle than the actual color. Try applying your concealer in an upside down triangle shape instead of the crescent shape that is under your eyes. Adding angles can create an illusion and cancel out any trace of a dark circle! Myth #2: If you have oily skin you need to look for oil free products. Answer: Yes BUT.... Of course adding oil based products to already oily skin can make you look like a grease pit, but also keep in mind that your skin needs its natural oils to stay youthful and healthy! Don't strip your skin of its essential oils with harsh cleansers and alcohol based toners, your skin will produce more oil in the long run! Having said that, buying an "oil free" product may not be as beneficial as you think. Oil free and oil control are two very different things. Sure, your oil free foundation wont add more oil to your skin, but will it control the oil that your skin will continue to produce throughout the day? Most likely the answer is no. Look for products that offer oil controlling agents like Quaternium 22, sulfur, hyaluronic acid, benzoyl peroxide, or tea tree oil. Your skin will not only regulate its natural sebum production, but you also wont be adding any more oil to the skin. Myth #3: Colors don't show up very well on dark skin. Answer: Quite the contrary! I LOVE doing makeup on clients with deeper skin tones. Bright eyeshadows always show up beautiful and vibrant against dark skin. It's all about having the right tools. Color wont show up on any skin tone if you aren't using the right brushes and you haven't prepped the skin properly! Always use an eyeshaow base if you want your eye shadow to pop, and invest in a few quality brushes. You'll be surprised! Myth #4: A lot of black eyeliner will make your eyes look bigger. Answer: No, no, no! Adding tons of dark color around the eye will actually make your eyes look smaller. If you want to make your eyes look bigger apply a thin line versus a thicker one. Try liquid or gel instead of a smudgy pencil, this will get rid of that smokey effect that can tend to shrink the eye. Depending on your eye shape a wing may be beneficial if you want to elongate the eye. Try light shimmery shadows and focus more on enhancing your lashes than applying eyeliner! Myth #5: If you have full lips you should avoid wearing lipstick and stick to gloss. Answer: Just because you have full lips does not mean you'll look silly wearing lipstick! People pay big bucks for full lips, so show off your natural assets! However, if you are self conscious about your full lips go for more neutral/natural shades and avoid gloss. Gloss will reflect light making them look larger. Stick with matte colors and skip lip liner. If you like your full lips then go all out! No color is off limits! Myth #6: Liquid foundation is cakey. Answer: This is one that really bothers me. There are so many misconceptions out there about liquid foundations. A lot of people fear that caked on look, and with good reason. But in reality, liquid foundation is not something you should be afraid of! Makeup comes in all sorts of textures, finishes, and coverages. Sometimes powders can be surprisingly heavier than liquid, and what looks like thick cream foundations are usually very sheer when applied correctly! Don't be afraid of the product itself, you just need to learn how to use it properly! Your tools are everything! You can achieve two very different looks with the same product by just switching your brushes! Myth #7: Face makeup clogs pores. Answer: Well yes it will, if you don't wash your face! Any makeup will cause breakouts and blackheads if you don't remove it completely and cleanse your skin at the end of the day! Certainly everyone's skin reacts differently to makeup, and we cant promise that everything will work out perfectly, but go see a professional and explain your concerns. Communicate to the makeup artist your skin type and he or she will set you up with a combination of products customized to your individual skin needs. I can almost promise you that you will be pleased with the result! Myth #8: Mineral is better. Answer: That depends on what you're looking for! Mineral makeup is great for drier skin types. It typically allows the natural oils of the skin to shine through the makeup and gives more of a luminous finish. If your skin is more oily and you prefer a dewy glow over a matte look, then you might prefer mineral as well. I personally love using mineral makeup on more mature clients, and clients who have naturally good skin. If you prefer a matte look, your skin is super oily, or you need a full coverage then mineral might not be the best choice. Also, if you have very sensitive skin you may not be able to wear mineral powder due to the high content of Mica. Mica is a form of crushed mineral, or rock, that is found in mineral makeup and many other powders. Sometimes sensitive and acne prone skin can become more red and irritated from the use of Mica based products if the mineral is not jet milled or ground very fine. Here's the deal: everyone's skin, coloring, and features are different. There's not any one right way to apply makeup or any one product that is better than another! What works for your friends may not work for you! My best advice is to always ask a professional, that's what we are here for! Focus on finding the best product for you, instead of following "makeup rules," or myths as I like to call them! Good luck! ;-)
0 Comments
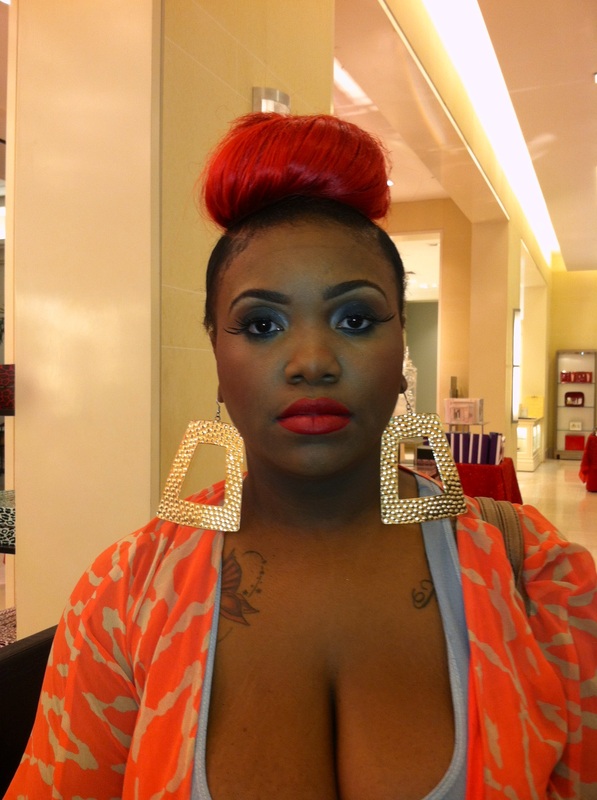
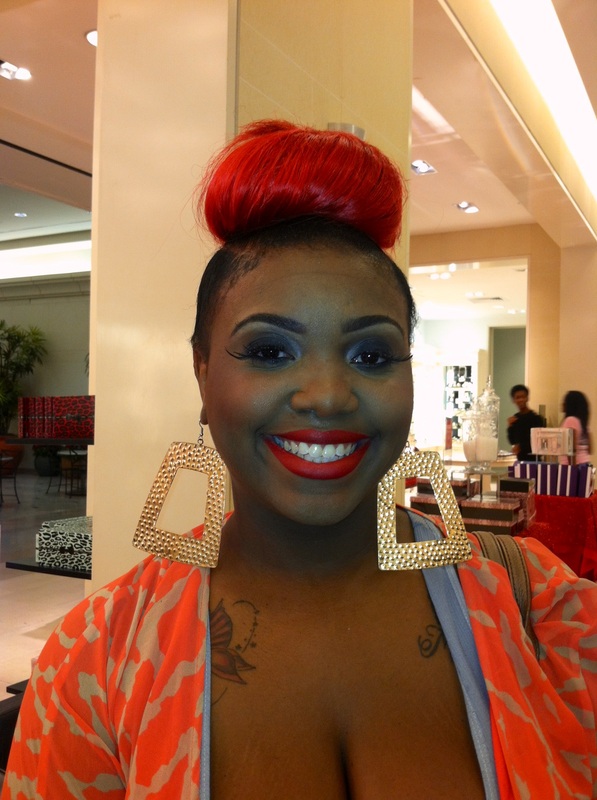
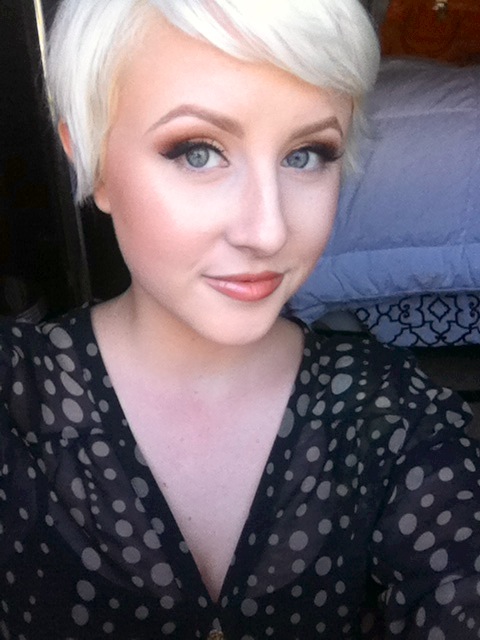
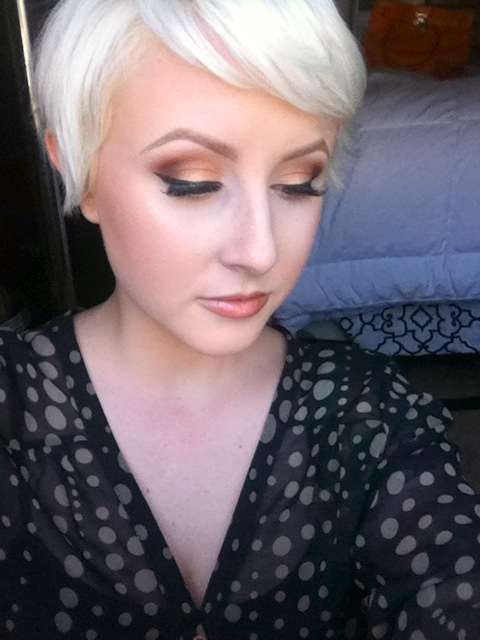
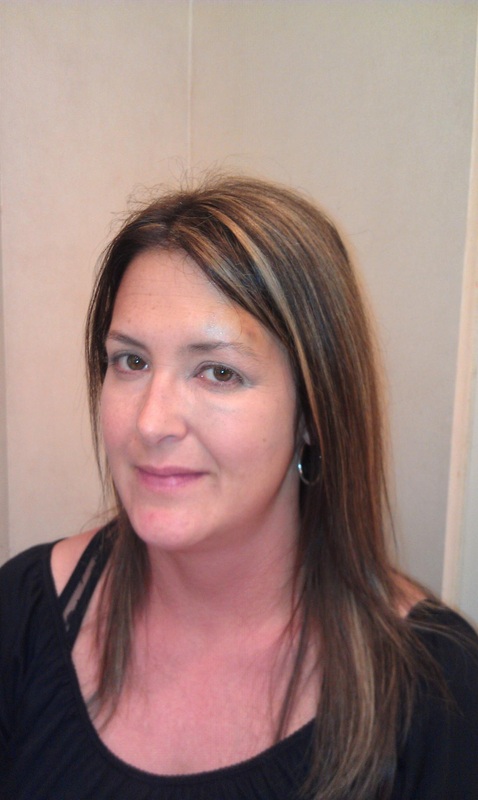
Here's one of my lovely clients from Saturday night! She was so sweet and GORGEOUS! She wanted a natural, defined, "Beyonce/Gabrielle Union" inspired look. I used all neutral colors on her eyes, a rosy blush, and really focused on perfecting her skin and brows. 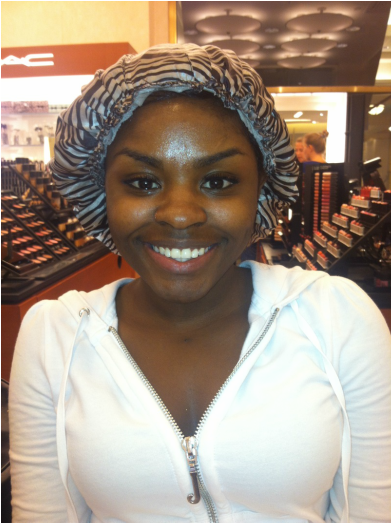

Here's a quick list of what we used:
Prep & Prime Skin Spiked Brow Pencil Bamboom Paint Pot Naked Pigment, Brown down, Embark, and Bamboo shadows Pointblack Liquid liner Smolder Eye Kohl Studio Tech Foundation Studio Finish Concealer Sculpting Cream in "Richly Honed" Select sheer loose - in two colors. A lighter shade under her eyes and through the center of her face, and a deeper shade around the perimeter of her face. Love Joy Mineralize Blush Clear Lipglass Hope everyone had a great weekend! Leave me some comments with questions or topics you would like me to cover on here!!!! xoxo 'Tis the season for PARTIES! A majority of my clients lately have been coming in for makeup for a holiday party or a night out with girlfriends! Here photos from two of the makeovers I did today... 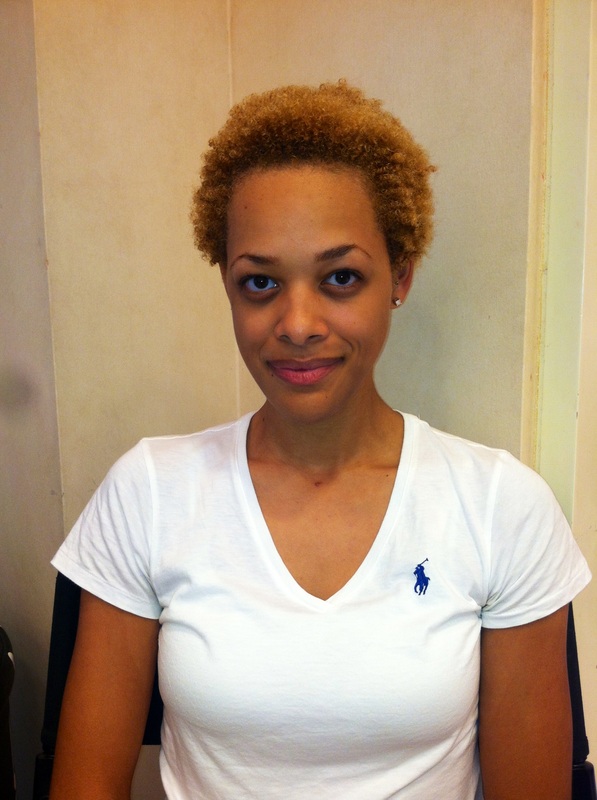
Ronya before-- She has naturally flawless skin! *Jealous*
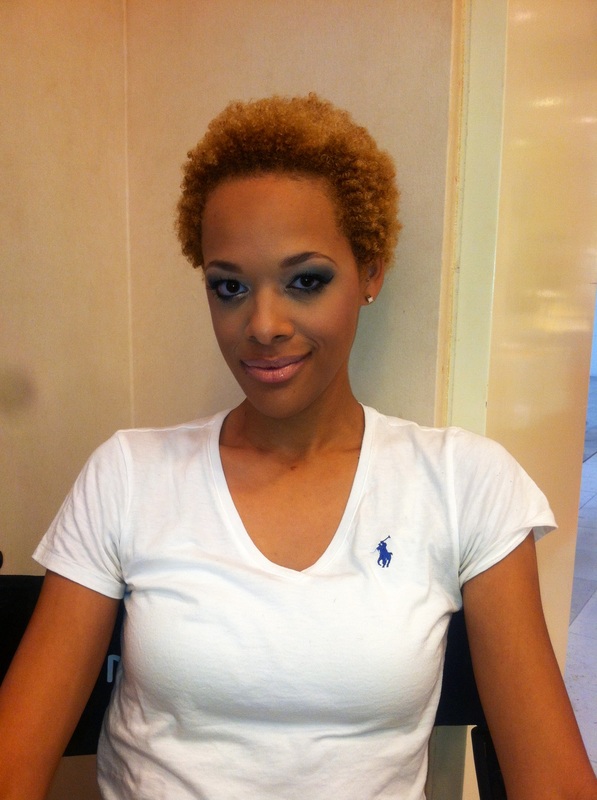
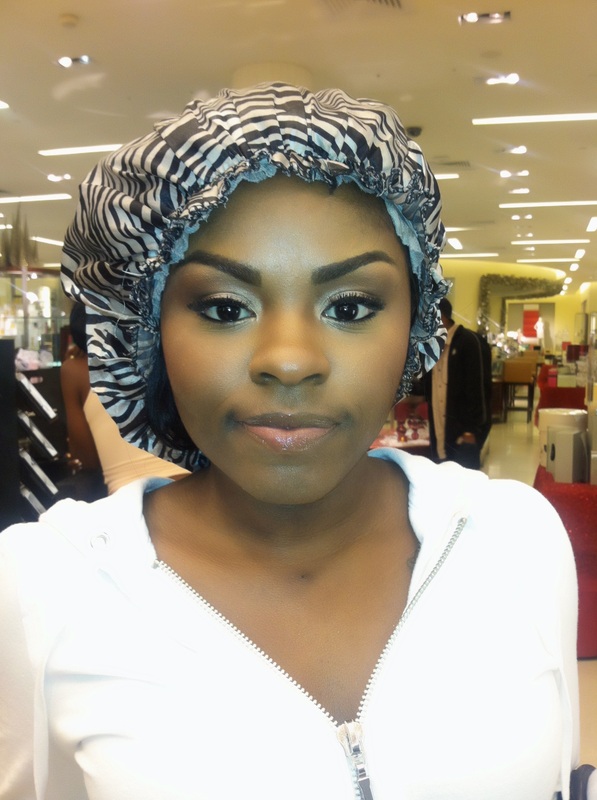
Ronya after - WERK!
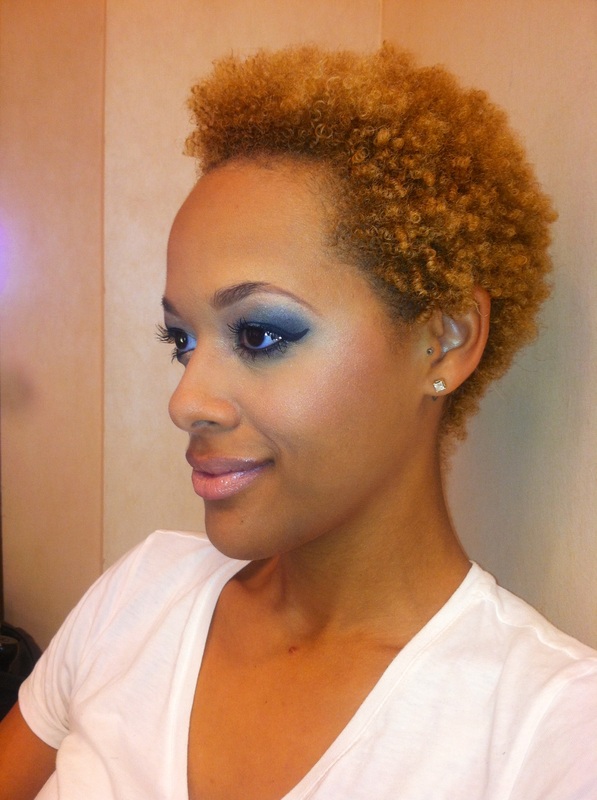
Ronya was headed to a non-formal holiday party. We decided to go with a silvery-blue eye to match her dress and a nude lip. I focused on highlighting her cheekbones since she complained that she has "no cheeks!" Complete Rundown: 1. Prime Skin - I used Prep & Prime Skin Base all over. I like to let that soak in for a few minutes and do the eyes in the mean time. 2. I filled in her brows with Lingering brow pencil. Her hair is light, and she has a petite face, so a dark brown would've overwhelmed her face. Lingering is a great brow pencil for dark blonde or light brown hair! 3. Eyes - I primed her eye with Soft Ochre Paint Pot. For shadow I used Tilt all over the lid, Knight Divine in the crease, and Nehru on the outer corner. I used Black track fluidline to line the top lashline and her waterline--She wanted a big wing! We skipped lashes and finished up with False Lash Mascara 4. Skin - Face and body was more than enough coverage! Her skin is absolutely flawless! Ronya mentioned that she struggles with dark circles under her eyes so I applied Studio Finish Concealer in two shades lighter than her foundation. I worked the concealer all the way across the top of her cheekbones to act as a highlight as well. We set everything with Select Sheer Pressed Powder. 5. Cheeks - We contoured with Blunt blush, which is great for contouring medium to dark skin tones! On her cheeks I applied an older Mineralize Skinfinish, and to be honest I forgot the name (So sorry! Dainty blush is a similar shade that would work well). After than I dusted a bit of Soft and Gentle MSF on top of everything to bring out the highlights. Doing that helped us add depth to her cheeks. 6. Lips - This girl loves a nude lip! We kept it simple: Myth lipstick and Myth Lipglass! TA DA! Jazmine was headed to her mom's birthday party, and a big party at that! The theme was Old Hollywood so of course we had to go with a red lip! Jazmine loves drama so we did a heavy smokey eye and big lashes to go with her bright lips! 
Jazmine before
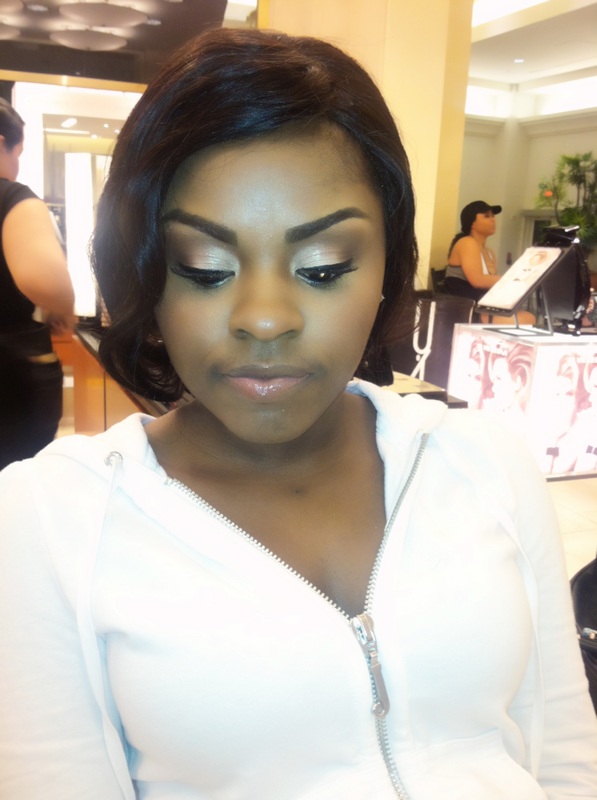
After
Jazmine was a lot of fun to work with! I love it when my client isn't afraid of makeup! Here's everything we used....
1. Prep and Prime Skin Base 2. I filled in her brows with Stud brow pencil. After than I carved out the shape with studio finish concealer and a 212 brush. Her brow hairs are a little longer so I set them in place with a clear brow gel. 3. Eyes - I prepped her eye with Groundwork Paint Pot to ensure nothing would crease throughout the evening. I then covered her whole eyelid in a THIN layer of Blitz & Glitz Fluildline. This helps the black shadow go on super black, so that way her smokey eye is SUPER SMOKEY :) ! I packed Black Tied eyeshadow on to her lid with a 242 and blended out the edges with a 224. Blending out the edges of the black shadow is very important, you don't want to see any lines! I swept Saddle into her crease and highlighted under her brows with Grain. For liner I smudged Blacktrack Fluidline across her lower lashline and into her waterline. We finished the eyes with #44 lashes and a light coat of mascara! 4. Skin - We chose Studio Fix Fluid. A full coverage and matte finish went well with the red lip and "Old Hollywood" theme of the party. For concealer I used Studio Finish Concealer, and like Ronya's, I extended the concealer across the top of her cheeks for a highlight. I used two different powders for this look, I pressed Select Sheer Loose in a much lighter shade into the concealer under her eyes, and I set the rest of her face with a shade that matched her skin. 5. Cheeks - Raizin blush all day long! Simple as that! 6. And for her beautiful red lip I used Prep & Prime lip to ensure everything would last, Viva Glam 1, and Cherry Lip Pencil. Beautiful and Glamorous! On the second Friday of every month MAC at Saks Fifth Avenue in Westshore Mall will be hosting Girl's Night Out classes! Our goal is to bring in loyal clients who are interesting in learning technique, trends, and products. Each month we will focus on a different theme or trend. This past GNO event focused on achieving the perfect red lip and holiday eye makeup to go with it. Everyone seemed to have a lot of fun and learn new tricks and techniques! Feel free to email me if you are interested in attending future classes. Here are a few photos from the event.. 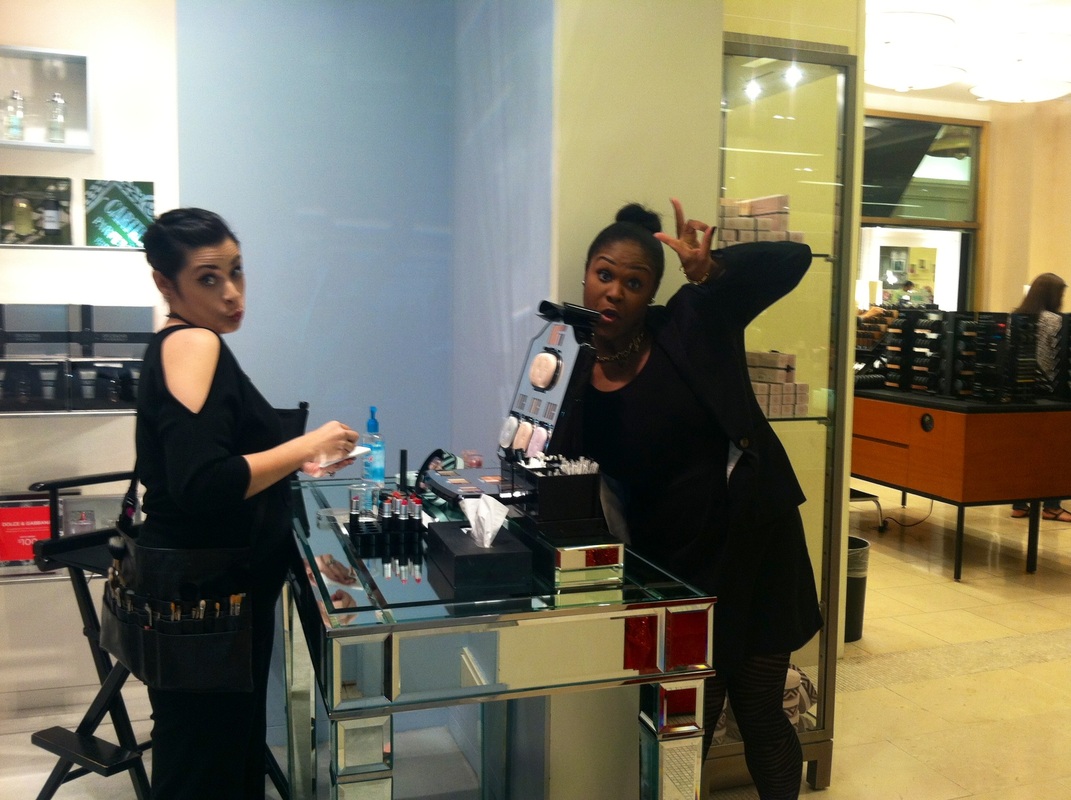
Bonnie and Nicole goofing off before everyone arrived
I must thank the fragrance dept. for allowing us to use such a beautiful table for our display!

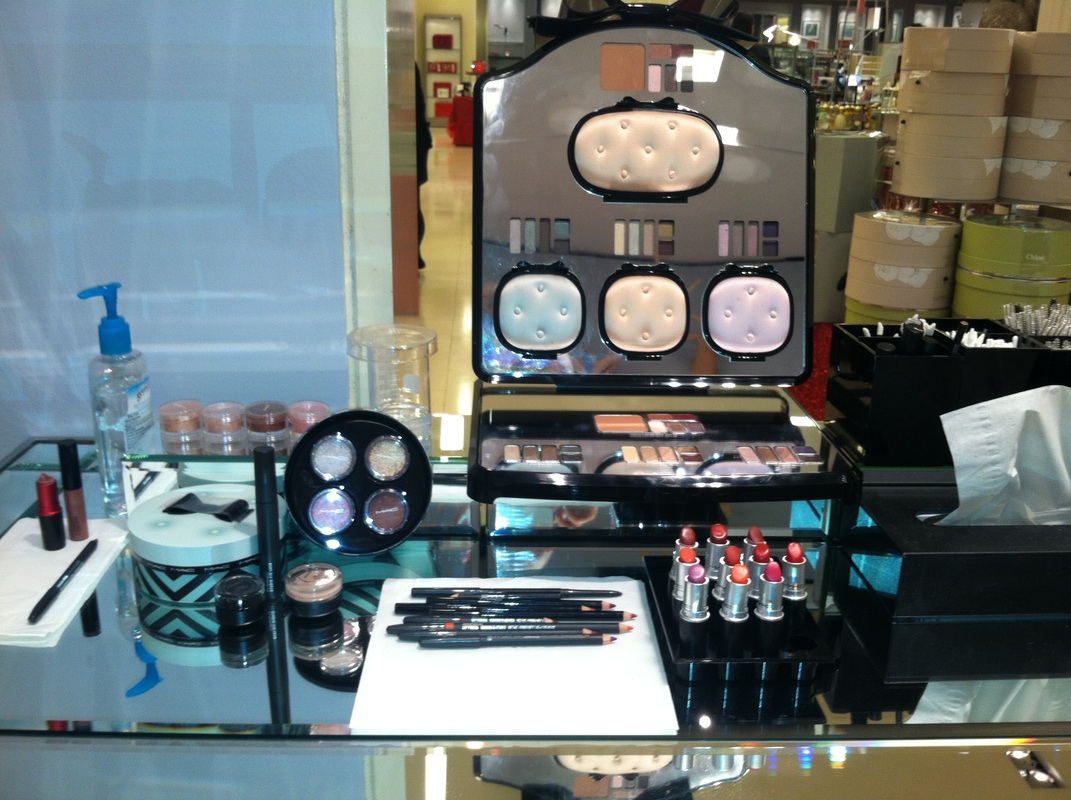
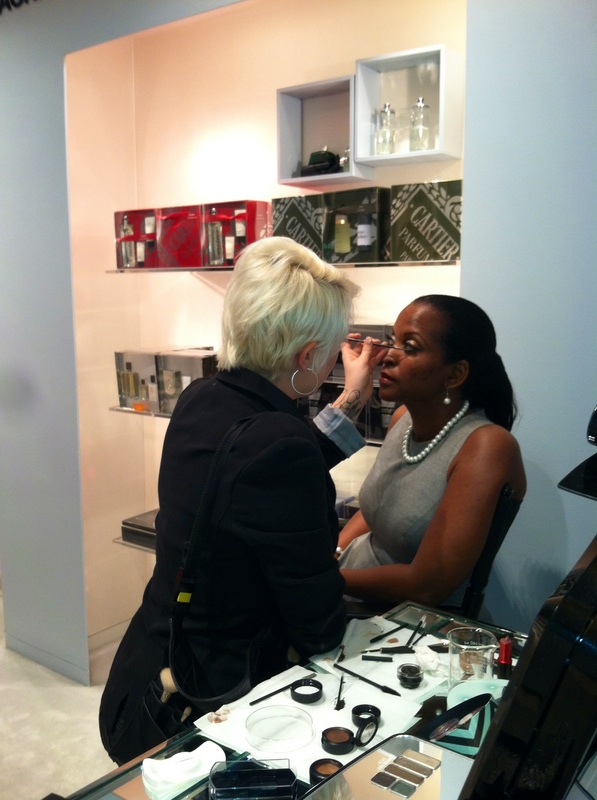
Each station had a mirror and products so the guests could practice on themselves.
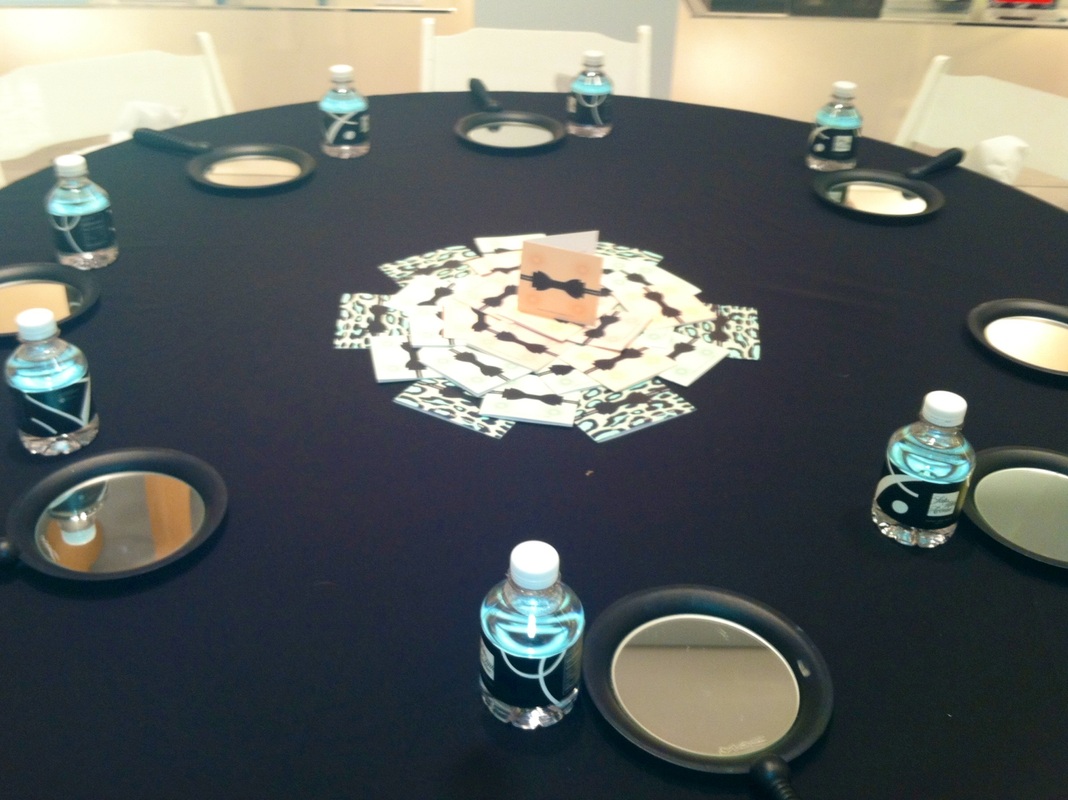
A few eye tutorial books that were left over form our holiday eye kits
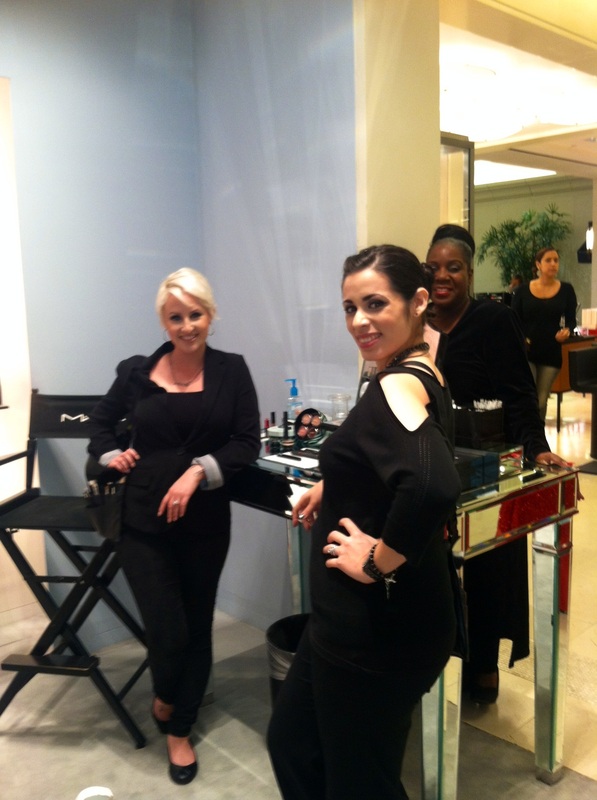
Monica, Bonnie, and Myself
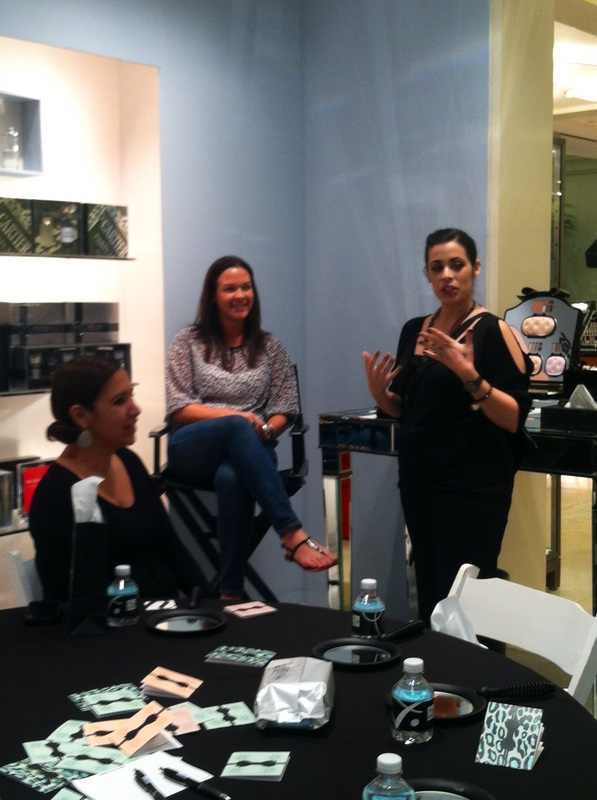
Bonnie sharing her red lip tips and techniques
Sharing my tricks for creating a fun holiday eye look
Overall it was a great success! I can not wait for next month's event!
 We all get in makeup ruts. I constantly find myself grabbing for my "neutrals" palette when I'm in a rush for work and then throughout the day I'm saying "I need to wear more color." Luckily, one of my staff members (THANKS ELISA!) gave me a few homework assignments and made sure to assign me colors I rarely wear. 12/6/12: I applied Designer Purple Pearl Glide liner all over the lid as a base - The Pearlglide liners are AMAZING! They are super bright and glittery, and what girl (or queen) doesn't like glitter? You can wear them as an eyeliner, or in my case they make a great base color. Next, I loaded up a 239 brush with Young Punk mineralize eyeshadow and pressed it into the liner. This shade is equally glittery! The photo just doesn't do it justice! *Note to self: buy a real camera.* I blended out the crease with Kid eyeshadow, a neutral flesh toned brown. Doing that blended out the purple so you couldn't see any harsh lines. My highlight, as always, was Gesso under the brow. And on the inner corners I used Vanilla Pigment. I finished with Boot Black Liquid Liner and lots of Zoom Lash Mascara! 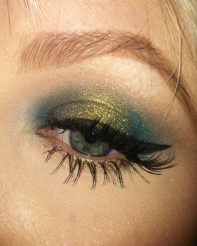 12/7/12:
I started off by applying Undercurrant Pearl Glide Eyeliner all over my lid and blending out the edges, fading the color upwards past my crease. I've decided I need these in EVERY color! After that I took Spruce, a crushed metal from our Guilty Passions: Brilliantly Cool holiday kit, and applied it on the inner and outer corners of my eye with a 219 brush. Using a 239 brush I pressed Old Gold pigment onto the Pearlglide liner on the center of my lid. To blend out all of the edges I used a 224 brush and applied Kid to the crease. My brow highlight was Vanilla, and I finished it off with Blacktrack Fluidline and my usual #3 lashes. Don't be afraid to try new things! Breaking makeup habits and forcing yourself to try new products is the first step towards becoming a successful artist! 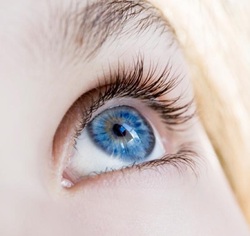 "How can I make my eyes pop?" is a question I hear all the time. If your goal is to enhance the color of your eyes then there are plenty of tips and tricks to make that happen! Color choice is the best way to bring out your eye color. I feel like I'm beating a dead horse, but I've gotta bring it up....the color wheel. Dun dun dun... 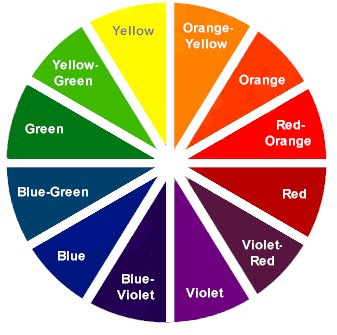
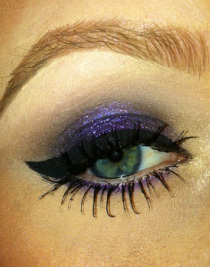
Color theory is really very simple! If you want to make one color stand out pair it with it's opposite, or it's complementary color. For example, the opposite of blue is orange-- so copper, gold, peach, and reddish brown tones will compliment blue eyes the best. Side note: grey and black looks great on blue eyes too! If you have green or hazel eyes clearly you don't want to wear red eyeshadow, at least I hope not! The next best shade would be purple, and any variation of it. I prefer purples with a lot of grey in them for every day use, since purple can be a bit bright for the office and what not. Try taupes, muted purples, and eggplant colors! Brown and hazel eyed girls always look great in blues! Blue is a hard shade to wear without looking like Mimi from Drew Carey, so look for navy tones to start off and then venture into brighter shades. Instead of a black smokey eye try using an off black with a hint of blue! Earth tones and neutrals look great on everyone, so don't forget about those "boring" browns and creams when you're picking out your new colors! Also, don't limit your options to these rules! This is just a loose guideline to help you pick colors that will compliment your eyes. There's no reason someone with green eyes cant wear green eyeshadow and so on.. 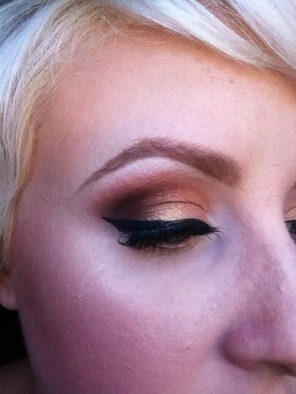
I like to use golds, bronze, and warm browns to bring out blue eyes.
Happy shopping!
Glad I could help this lovely lady cover that shiner....Ouch! 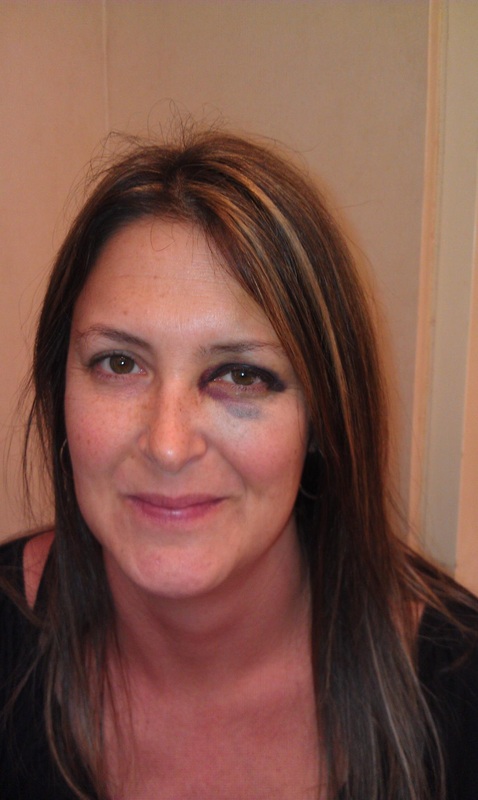
Someone had a little too much fun on their birthday! When covering a bruise it is important to remember to color correct. Remember our handy color wheel? 
My client's bruise was mostly a dark blue shade, in person at least. If you look at the color wheel the opposite of blue is orange. Therefore, in order to cancel out the blue we would have to apply an orange product onto the bruise then follow with concealer. I applied a sheer layer of Chilli Lipstick to counteract the blue. When I grabbed the bright burnt orange lipstick my client looked at my like I had 2 heads! I assured her that this was a KEY step in order to conceal her bruise. If you apply concealer on top of a bruise or tattoo without doing any sort of color correcting the end result will look grey and muddled.
After lightly applying the Chilli Lipstick all over her eye area I dusted on a small amount of powder. Lightly powdering after each step helps build layers without the product caking. On top of the powder I used a sponge to apply Studio Finish Concealer. The sponge allowed me to apply a heavier layer of concealer. Again, I set this step with powder. Luckily that was all we had to do. Sometimes it is necessary to repeat the concealer and powder a few more times. Do as many layers as needed, if the end result looks a little heavy or made up just spray a little Fix + and buff out the edges. This technique can also be used to conceal birthmarks, tattoos, and scars.. 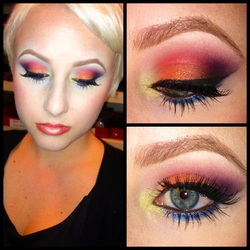 I finally forced myself to wear some color! Hooray! I used several shades, which I am not used to doing. I like to keep things pretty minimal...But I am still really happy with how it turned out!
Products Used (All MAC): Painterly Paint Pot Coral Crepe Paint Pot (Limited edition)- Lid only Rule Eyeshadow- Lid Magenta Madness Pigment - Crease Grape Pigment/Contrast Eyeshadow - Outer V Just Eyeshadow - Inner corner Freshwater Eyeshadow- Lower liner Vanilla Eyeshadow - Highlight Blacktrack Fluidline, Haute & Naughty Mascara, #3 Lashes... I know that's a lot! But work with what you already have and try to add your own spin to it! Good luck :) Hey guys! Here is a lighter version of a smokey eye. It's still dramatic, but not super dark. I used minimal products, so it will be easier to replicate! :) 
1. Prep the entire eye area, I use MAC Painterly Paint Pot. This will keep your shadow from creasing, your liner from smudging, and your shadow from fading. A good primer is KEY, and I will probably mention this in every eye tutorial! (Side note: Please excuse my nails! They will be getting filled in soon!)
2. Apply a dark base to the lid area. Most people skip this step, but I find it necessary. When working with dark shades many times people notice the color will go on sheer and not as pigmented. I always find that when I skip this step you can see my skin showing through the shadow. Applying a dark base ensures the color will be more saturated and intense. For this step I used Little Black Bow fluidline from MAC's Glamour Daze holiday collection. It's actually a gel eyeliner, but I really like it as a shadow! If you can't get your hands on that you could use any grey eye pencil.. 3. With a blending brush, like the 224, blend the fluidline up towards the crease. Make sure you cant seen any harsh lines. 4. With a pencil brush apply a black shadow just along the lashline and blend upwards. 5. Highlight under the brow and on the inner corners of the eyes. My go to color is Vanilla. A lot of people also like Brule, Mylar, Bisque...I prefer a matte shade on the brow. 6. Line the upper and lower water line and SMUDGE! Don't be afraid of it being a little messy. Smokey isn't meant to be clean! 7. Line the top lashline and smude out with a 214 brush. 8. Finish with mascara!  It's getting to be that time in our lives when we need to shed the college girl look and grow into a more mature style. Transitioning from sweat pants and last nights smeared eyeliner to business attire and lipstick can be quite the adjustment, but at some point we all must do it! A girlfriend of mine contacted me this evening asking advice on how to look more mature for her upcoming job interview. This really got me thinking! As young women entering the workforce we face a significant struggle when we want to be taken seriously and seen as educated professionals. The challenge becomes even harder when we are cursed, and at the same time blessed, with a juvenile appearance. As a young twenty something, I can share the frustration of many young women fresh out of college. Being qualified for a position and being turned down simply because of a young and inexperienced appearance can be very frustrating! Here are a few tips to help you prepare for that upcoming interview at a "Big girl" job! 
1. Do your eyebrows! Keeping your brows groomed and filled in will add an instant lift and structure to your face. If you are blonde choose a shade darker than your hair, and if your hair is dark be sure to chose a shade lighter than your hair! You'd be surprised how something so simple can make such a difference! 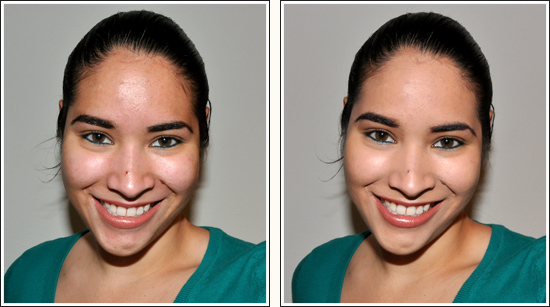
2. Wear foundation. Yes, even if you have good skin! Whether its a tinted moisturizer or full coverage, foundation will help even out and brighten your skin. I would suggest going to your local makeup counter and having one of the artists match you up to the proper foundation. Don't be afraid of that "cakey" look! If you are matched to the right kind you wont be cakey! Remember- the key to having good looking foundation is to use proper skin care! 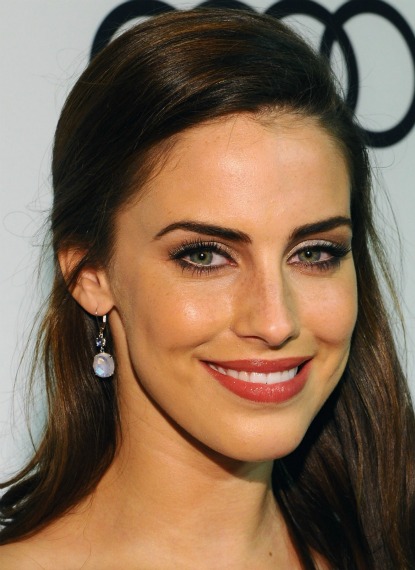
3. Wear a lipstick with some color! Berry and rose tones tend to look good on most people. Stay away from pastels and nudes which tend to look young and trendy. Look for more classic timeless shades that aren't too dark or bright for the office. I love Viva Glam 6 from MAC with Half Red or Whirl lipliner- looks great on almost everyone! For darker skinned girls try Sheer Plum lipstick with Plum, Cork, or Chestnut liner.
A few more helpful tips... *Use mostly matte shades. A subtle shimmer on the eyes is alright, but try to avoid using more than one shimmery shades. Also, use a matte blush or bonzer. *Stay away from pastel or bright blush, go with a more neutral shade. Some good colors include Tenderling, Blushbaby, Coppertone, and Raizin, to name a few.. *Leave your dark smudgy eyeliner behind! Smears and smudges always scream "Party girl" to me. Save that great eye kohl for the weekend. *Less is more! Don't let your makeup draw attention away from your qualifications! Good luck! :) |
Lindsay TravisMy attempt at keeping up with the times... Archives
June 2016
Categories
All
|
 RSS Feed